Making Exteriors Pop: Photography Tips for Curb Appeal
17 October 2025
Ever scrolled through real estate listings and found some houses looking like they belong on the cover of a design magazine while others... well, let’s just say they could use a little help? That’s the power of curb appeal photography. The right shot can make a home irresistible before a potential buyer even steps inside.
But here’s the kicker—capturing that picture-perfect exterior isn’t as simple as snapping a quick pic with your phone. Lighting, angles, composition, and even minor tweaks can make or break the shot.
So, whether you’re a real estate agent, homeowner, or photographer looking to master the art of exterior photography, sit tight. We’re about to dive into some quirky yet practical tips to make those exteriors pop! 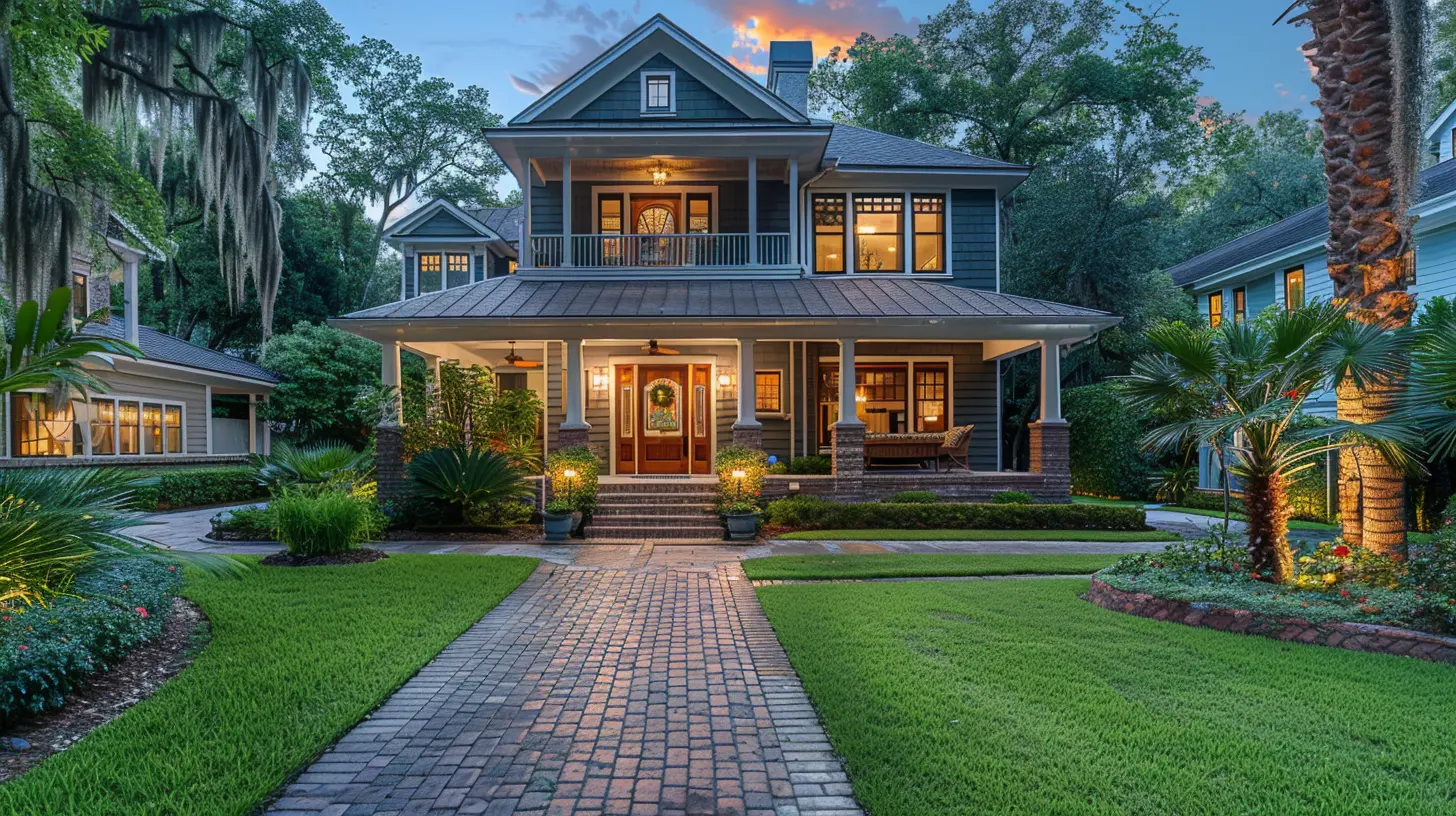
1. Timing is Everything: The Golden Hour Magic
You wouldn’t take a selfie under harsh fluorescent lights, right? The same logic applies to houses. The best time to shoot exterior photos is during the golden hours—just after sunrise or before sunset.Why? Soft, warm lighting creates a dreamy look without harsh shadows or overexposure. Midday sun, on the other hand, can make everything look washed out and uninviting.
Pro Tip:
If you’re dealing with an east-facing home, try shooting in the morning. West-facing? Late afternoon works best. North and south-facing homes? Play around with different times and overcast days to avoid stark contrasts.
2. Angle Like a Pro: Finding the Sweet Spot
A straight-on shot might seem like the obvious choice, but it’s often the least flattering. Instead, position yourself at a slight angle to show depth and dimension.Imagine you’re introducing the house to a potential buyer—give them an inviting first impression, not a boring mugshot.
Best Angles to Try:
- Three-quarter shots: Capture two sides of the house to show depth.- Slight low angles: Make the home appear grander and more imposing.
- Eye-level shots: Maintain a natural, balanced perspective.
Avoid super high or low angles unless you’re going for a dramatic effect. A house should feel welcoming, not like it’s towering over the viewer or sinking into the ground. 
3. Clean Up the Scene: The Devil’s in the Details
You wouldn’t post a messy bedroom photo while selling a house, so don’t let exterior clutter ruin an otherwise great shot.Things to Watch Out for:
✅ No trash cans in sight.✅ No cars blocking the driveway.
✅ No garden hoses lying around.
✅ No dead plants or overgrown grass.
✅ No stray toys or lawn ornaments photobombing the shot.
A little staging—a neatly swept driveway, fluffed-up pillows on outdoor furniture, and a fresh welcome mat—can take the curb appeal from "meh" to "marvelous." 
4. Play with Composition: Rule of Thirds for the Win
Ever wonder why some photos look effortlessly professional while others seem... off? The rule of thirds is a game-changer.Here’s how it works:
Imagine your image divided into nine equal sections using two horizontal and two vertical lines. Instead of centering the house, position key elements (like the door or windows) along these lines or at their intersections. It creates a naturally balanced and aesthetically pleasing composition.Pro photographers swear by it, and trust me, once you start using it, you'll never go back to taking awkward, off-centered shots.
5. Lighting Tricks: Avoid the Harsh Glare
We’ve covered the golden hour, but what if you have no choice but to shoot in bright daylight? No worries—here’s how to work around it:- Find shade: Trees, awnings, or even clouds can help soften direct sunlight.
- Use a polarizing filter: This little gadget reduces glare and enhances colors, making skies bluer and greens greener.
- Adjust your exposure: If your camera allows, slightly underexpose your shot to avoid blown-out highlights.
Oh, and if you’re shooting at night (hello, stunning twilight shots!), make sure the porch lights are on, and the windows glow warmly—it adds a magical, inviting touch.
6. Let the Sky Work for You
A dull, gray sky can make even the most charming home look sad and lifeless. But guess what? You don’t have to settle for bad weather.- On an overcast day: Boost contrast and saturation in post-editing to bring life back to the image.
- On a clear day: Make sure the blue sky complements the home’s colors instead of overpowering it.
- If the sky is bland: Swap it out! Many photography tools allow you to replace a boring sky with something more vibrant. (Just don’t overdo it—nobody wants to see a neon sunset over a suburban neighborhood.)
7. Find the Perfect Focus
Blurry images are a one-way ticket to looking unprofessional. No one wants to squint at a listing photo, trying to figure out if the place has a front porch or not.So how do you nail sharp, crisp shots?
- Use a tripod. Hands tend to shake more than you realize, and stability is key.
- Adjust your aperture: Aim for f/8 to f/11 to keep everything in sharp focus.
- Tap to focus: If using a phone, manually tap on the house to ensure it’s in focus.
A well-focused photo makes the home look polished and professional—exactly what potential buyers want to see.
8. Add Some Personality: Make It Feel Like Home
A house is more than just bricks and paint—it’s a potential home. So, why not make it feel like one?Subtle details can make a big difference:
✅ A cozy front porch with a rocking chair.
✅ A fresh potted plant by the door.
✅ A seasonal wreath or welcome sign.
✅ Soft outdoor lighting for an inviting glow.
These small touches help buyers visualize themselves living there—it’s all about selling the dream, not just the space.
9. Edit Like a Pro (But Keep It Real)
Editing is like seasoning food—you want just the right amount. Too little, and the image looks bland; too much, and it becomes unrealistic.Stick to these basic tweaks:
✔ Adjust brightness and contrast for a balanced look.
✔ Enhance colors slightly for a vibrant but natural finish.
✔ Remove minor blemishes (like stray leaves or spots on the driveway).
✔ Keep the edits subtle—no Instagram-style filters!
An over-edited photo screams fake, and buyers will notice when they visit in person. The goal is to enhance the natural charm, not create a fantasy.
10. Experiment and Have Fun!
At the end of the day, photography is an art. Don’t be afraid to try different compositions, play with perspectives, and get creative.Take multiple shots from various angles and lighting conditions—you never know which one might turn out to be the showstopper. The more you experiment, the more you’ll refine your skills and develop an eye for what truly makes an exterior shine.
Wrapping It Up
Great curb appeal photography isn’t just about snapping a quick photo—it’s about telling a story. The right lighting, angles, and small details can turn an ordinary home into a jaw-dropping listing that potential buyers can’t resist.So, next time you pick up your camera (or phone), remember: timing, composition, and a little extra TLC go a long way. After all, your goal is to make that exterior pop!
all images in this post were generated using AI tools
Category:
Real Estate PhotographyAuthor:

Vincent Clayton
Discussion
rate this article
1 comments
Jaxon Kearns
Great tips! Elevating curb appeal through photography not only attracts buyers but also showcases the beauty of homes. Let your creativity shine and inspire!
October 25, 2025 at 2:25 AM
Vincent Clayton
Thank you! I'm glad you found the tips helpful. Elevating curb appeal through photography truly makes a difference in showcasing a home's beauty!